Membership websites are a fun challenge. They’re usually content-heavy, so you want a CMS like Statamic. But you also need to manage member authentication and the business logic. And that's where Laravel comes in.
The catch is that Statamic’s authentication forms store new users in flat files by default, next to Statamic users like admins and editors. That’s not ideal. Because if member users do not have access to the Statamic control panel, this creates confusion. Also, as the flat files grow to thousands, it will get messy and impact site performance.
I had a client project with this exact problem. It was an education site with gated content.
So I’ll show you, step by step, how I solved it. You’ll see how to gate content in Statamic and how to split responsibilities so editors publish in Statamic while Laravel tackles the member features.
1. Setup two authentication guards
To separate Statamic users from your Laravel app users, set up two user guards and two user providers in config/auth.php.
You need one guard and provider for Eloquent users and another for Statamic users:
// config/auth.php 'guards' => [ 'web' => [ 'driver' => 'session', 'provider' => 'users', ], 'statamic' => [ 'driver' => 'session', 'provider' => 'statamic', ],], 'providers' => [ 'statamic' => [ 'driver' => 'statamic', ], 'users' => [ 'driver' => 'eloquent', 'model' => env('AUTH_MODEL', App\Models\User::class), ],],phpThis gives each user group its own “door” and storage.
While you’re in config/auth.php, add separate brokers for each provider. You’ll have two for Statamic and one for Eloquent. Statamic splits resets and activations, while Eloquent doesn’t by default.
//config/auth.php 'passwords' => [ 'resets' => [ 'provider' => 'users', 'table' => env('AUTH_PASSWORD_RESET_TOKEN_TABLE', 'password_reset_tokens'), 'expire' => 60, 'throttle' => 60, ], 'statamic_resets' => [ 'provider' => 'statamic', 'table' => env('AUTH_PASSWORD_RESET_TOKEN_TABLE', 'password_reset_tokens'), 'expire' => 60, 'throttle' => 60, ], 'statamic_activations' => [ 'provider' => 'statamic', 'table' => env('AUTH_ACTIVATION_TOKEN_TABLE', 'password_activation_tokens'), 'expire' => 4320, 'throttle' => 60, ],],phpNow each user type can reset or activate accounts in the right place.
Next, in Statamic’s users.php config, choose which guard is used on the frontend and which is used for the Control Panel:
In the example below, we’re using the statamic driver for Control Panel users and the web driver for frontend users.
// config/statamic/users.php 'guards' => [ 'cp' => 'statamic', 'web' => 'web',],phpThis keeps editors in the CP guard and members in the app guard.
Any non-Statamic routes (for example, routes you’ve added in routes/web.php) are unaffected by these changes. Those routes use the guard set inside the defaults array in config/auth.php. In a fresh Statamic install it should be web.
Also, ensure passwords points to the correct reset and activation configs:
// config/statamic/users.php 'passwords' => [ 'resets' => 'statamic_resets', 'activations' => 'statamic_activations',],phpThis wires Statamic’s flows to the right broker entries.
After this setup we effectively start using the database with Statamic. So don’t forget to set up your local database and run:
php artisan migratebashThis creates the tables your auth flows need.
2. Authentication forms conundrum
The easiest way to build auth forms is to use Statamic user tags. The problem is that tags always talk to the user repository set in config/statamic/users.php. By default it is file.
Statamic does allow storing users in a database. That lets you use all user form tags without worrying about auth routes and controllers. However, we run into the same problem I mentioned earlier. Now all users, Statamic editors and app users, get lumped together. I think this is better than flat files, but it still may not fit your project.
If you go this route, you also get the bonus of using Statamic roles and permissions without a separate package, and you can manage app users through the CP. But if you plan to use the Filament admin panel for the app side, it's irrelevant.
So there are trade-offs. But for me, lumping all users together feels a bit icky.
So let’s set this up ourselves. Don’t worry. We won’t write it from scratch.
Using Laravel starter-kit
To set up auth ourselves, the quickest way is to create a fresh Laravel app with a starter-kit and copy what we need for auth. The starter-kit docs also explain guards and scaffolding links you can trace back.
Select the Vue starter-kit. This may help later if you want to set up Vue.js for your app and even turn it into an SPA with Inertia.
Here is what we need to copy:
Auth folder from
app/Http/Controllers.Auth folder from
app/Http/Requests.Auth folder from
tests/Feature.routes/auth.phpand include it inroutes/web.php:Dashboard route in
routes/web.php.
If you’re not going to use Inertia then update the create methods inside controllers to point to your views. Here is a register controller example:
<?php namespace App\Http\Controllers\Auth; //...use App\Http\Controllers\Controller;use Illuminate\View\View; class RegisteredUserController extends Controller{ /** * Show the registration page. */ public function create(): View { return view('auth.register'); } //...}phpThis returns a Blade view instead of an Inertia response.
If you want to use Vue.js for auth, possibly with Inertia, and turn your app into an SPA, copy everything from resources/js and views/app.blade.php for your app routes. Laravel starter-kits come with TypeScript by default. You’ll need to integrate TypeScript into your project. Check package.json for required packages, and copy vite.config.ts, tsconfig.json, eslint.config.js.
Update the User model to enable email verification:
<?php namespace App\Models; use Illuminate\Contracts\Auth\MustVerifyEmail;// ... class User extends Authenticatable implements MustVerifyEmail{ // ...}phpThis makes Laravel send and enforce verification for users.
View templates
I’m not going to walk you through every view template here. Whether you use Livewire, Vue, or React, you can copy auth setup from the Laravel starter-kits. If you’re using Blade with Alpine, here is a community-maintained starter-kit from Laravel Daily.
In my starter-kit Bedrock, I use Blade with Alpine Precognition forms.
Some things to note about Bedrock setup:
You need to add middleware to all routes where you use a form with Precognition.
Precognition works with validation rules in the route’s form request. So refactor Controllers to use Form Requests. See form requests.
Update Controllers to return
JsonResponseinstead of redirect.
Check the final code for controllers and views in the Bedrock demo repository.
Maybe in the future I’ll update Bedrock with an option to scaffold authentication out of the box and let you pick Alpine.js with Blade or Vue.js with Inertia.
3. Gating Statamic content
You can protect your content per-entry or per-collection.
In Statamic they’re called Protectors.
Protected pages are automatically excluded from the static cache.
Protecting an entry
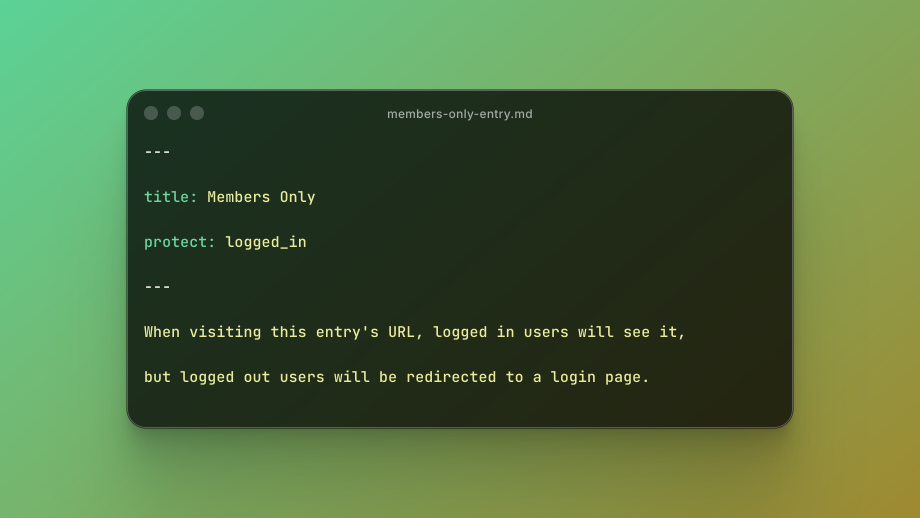
To protect an entry, add a protect variable with a corresponding scheme name.
Statamic comes pre-configured with a logged_in protection scheme. To see all schemes and configure your own, check config/statamic/protect.php.
Here is how your entry might look:
--- title: Members Only protect: logged_in --- When visiting this entry's URL, logged in users will see it, but logged out users will be redirected to a login page.yamlThis adds a per-entry gate with a simple “logged in” rule.
You can create a Button Group or Select field with a handle protect to let editors toggle this in the control panel instead of editing entries by hand.
Protecting a collection
To protect a whole collection, inject a protect variable to the collection’s YAML config file.
--- inject: protect: logged_inyamlThis applies the same rule to every entry in the collection.
Create a custom protection driver
Default logged_in protection does not enforce verified users. So let’s create a custom protector AuthVerified that extends the Authenticated protector.
// app/Protectors/AuthVerified.php <?php namespace App\Protectors; use Illuminate\Support\Facades\Auth;use Statamic\Auth\Protect\Protectors\Authenticated;use Illuminate\Contracts\Auth\MustVerifyEmail; class AuthVerified extends Authenticated{ public function protect() { if (Auth::guest()) { abort(redirect($this->getLoginUrl())); } $user = Auth::user(); if ($user instanceof MustVerifyEmail && !$user->hasVerifiedEmail()) { abort(redirect(route('verification.notice'))); } }}phpThis blocks unverified users, and it redirects them to the right pages.
Register the driver inside a service provider’s boot method as per docs:
// app/Providers/AppServiceProvider.php use App\Protectors\AuthVerified;use Statamic\Auth\Protect\ProtectorManager; public function boot(): void{ app(ProtectorManager::class)->extend('auth_verified', function ($app) { return new AuthVerified(); });}phpThis makes your new driver available as auth_verified.
Add to the protect.php config file:
// config/statamic/protect.php 'schemes' => [ //... 'logged_in' => [ 'driver' => 'auth', 'login_url' => '/login', 'append_redirect' => true, ], 'logged_in_verified' => [ 'driver' => 'auth_verified', 'login_url' => '/login', 'append_redirect' => true, ], //...]phpThis gives you two choices: logged-in only, or logged-in and verified.
Where to take this next
You now have clean separation between Statamic editors and app members, plus flexible content gates.
If you tried a different approach or found pitfalls I should mention, message me on X. Or if you want me to add auth scaffolding option to Bedrock, let me know that too.
And if you’re building an educational platform, a community, or want to publish members-only content, and looking for help, I’m available for hire.